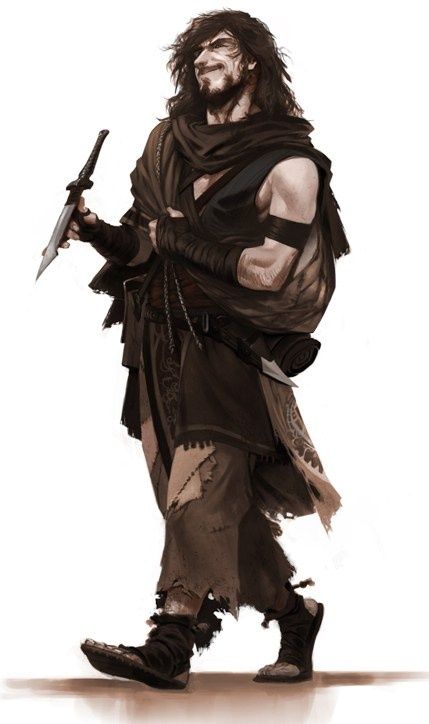
Monday, 19 September 2016

HA3 Task 5 - Evaluation of Work

Artwork

I have reviewed all of the artwork that I have created and I think could have done a lot better of a job. This is because the ideas that I have in my head are poorly translated to paper, which is mainly due to my poor skills in art but for what I have created, each of the images look like what they are supposed to be and I have created artwork which is truly the best I am capable of producing.


In terms of objective all of the visual requirements are their and all of the objectives have been met and although I am not very skilled at art I believe that I have accomplished everything that the task has asked me to do.


Time Management

The next time I perform a task like this I will have to considered putting more time into my art work to achieve superior results and more visually appealing art. I will also need to use my time wisely when completing this task.

Level of Professionalism

I believe that overall quality of my work was very good (In terms of what I am usually capable of) and the manner in which I acted when I creating this work is just as good as it usually is when I am concentrating and in a solid work ethic.

HA3 Task 4 - Sign-off


This is my legal & ethical checklist document, when I signed it, I was confirming that my artwork is my own and does not infringe and copyright or trademark laws and it does not share any resemblance to other peoples work.

HA3 Task 3 - Final Illustration Presentation

Environment: Dungeon Final


Character: Jonathyn Bearswick Final


Jonathyn Bearswick: Black and White


Jonathyn Bearswick: Coloured


Equipment: 


Knife


Knife: Black and White


Knife: Coloured


Flintlock Pistol


Flintlock Pistol: Black and White


Flintlock Pistol: Coloured


HA3 Task 2 - Development Studies

Environment: Dungeon plan


Character: Jonathyn Bearswick


Equipment: 


Sword


 Pistol


HA3 Task 1 - Reference Research


In this project I have decided to look at a medieval era and use most of the architecture and designs from that point in time. I also prefer this point in time as it looks aesthetically pleasing as since I prefer this era in time I believe I will be able to get more out of it.

The environment I will work with is a dungeon these areas are usually dark, damp and depressing with very little colour and very little light as usually torches light the rooms. Dungeons (depending on their age can be relatively old which can make them internally unstable as well as cold and wet. Meanwhile some dungeons are bloodstained and have a darker history or dark acts and horrible misdeeds through crime, abuse of power and torture.   


bygajatix (2011) Medieval dungeon VR / AR / low-poly 3D model. Available at:
 https://www.cgtrader.com/3d-models/architectural-interior/other/medieval-dungeon
(Accessed: 7 December 2016).


Morris, E. and Exploring-Castles The castle dungeon and the Oubliette: The truth about these medieval prisons. Available at:
 http://www.exploring-castles.com/castle_dungeon.html
(Accessed: 7 December 2016).


FZD school of design (2014) Available at:
https://uk.pinterest.com/pin/470415123549388799/
(Accessed: 7 December 2016).

Carbon, K. (2016) DUNGEON SYNTH DIGEST XIV. Available at:
 http://hollywoodmetal.com/2016/08/02/dungeon-synth-digest-xiv/
(Accessed: 7 December 2016).


Main Protagonist = Jonathyn Bearswick

Roguish
Charismatic
Experienced 
Handsome?


Errol Flynn
Tim, G. (2007) Posts tagged ‘Errol’. Available at:
http://www.theerrolflynnblog.com/tag/errol/
(Accessed: 7 December 2016).


 photo 29284461b9476193b3f20cb0ec06062b_zps748f9a87.jpg
Photobucket: Photo by danbadour. Available at: http://s1233.photobucket.com/user/danbadour/media/29284461b9476193b3f20cb0ec06062b_zps748f9a87.jpg.html
(Accessed: 7 December 2016).
File:James Dean in Rebel Without a Cause.jpg
James Dean (2016) in Wikipedia. Available at:
https://en.wikipedia.org/wiki/James_Dean
(Accessed: 7 December 2016).


Equipment: Sword, Pistol, Deck of Playing cards

Sword
Danish medieval Dagger. Available at:
http://www.darksword-armory.com/medieval-weapon/medieval-daggers/danish-medieval-dagger-1815/
(Accessed: 8 December 2016).
Available at:
http://weknowyourdreams.com/single/sword/sword-08
(Accessed: 8 December 2016).


Pistol


Clipart kid (2016) Available at:
http://www.clipartkid.com/old-western-gun-clip-art-xSncYE-clipart/
(Accessed: 8 December 2016).


English 18th century flintlock pistol (2014) Available at:
http://www.bladesandbows.co.uk/english-18th-century-flintlock-pistol-2532-p.asp
(Accessed: 8 December 2016).


 Deck of playing cards


A deck of playing cards (2013) Available at:
http://www.allworship.com/deck-cards/
(Accessed: 8 December 2016).


HA2 Task 1 - The Purpose of Concept Art


HA4 Task 1 - The Purpose of Concept Art


What is Concept Art?

Concept Art is a form of Illustration that is used in the creation of most forms of media production such as movies (in their CGI departments), Graphic Novels, Comics and in the case I will be exploring, Video games. The people who work in the industry use concept art in a multitude of different ways to plan out what assets and characters will be in their game and what will not make it in. This is done in a three part process which eliminates all of the bad ideas and all good ideas are then polished and released to the public. The three stages are the exploration stage, the approval stage and the promotional stage.


Exploration

The exploration stage is where ideas and sketches are explored to separate the wheat from the chaff and find the best idea out of a multitude of options. Ideas are usually put forth from sketches which the devs can use to easily express their ideas to other people without having to put too much effort or detail into their design so that if it is a poor design or loses out to a superior design then it can be scrapped without hours of work going to waste. Once the devs have an idea of what they want a large group of artists make multiple designs of a similar character and (through a process of elimination) the design the devs want for their asset is discovered.  The assets include NPC's, pieces of apparel, environmental characteristics, building's or vehicle's.


Concept Art for the creation of the Dragons in Skyrim

Concept Art for the creation of  the Super Mutants from Fallout 3


Approval

The approval stage is where a piece of art is chosen by the developers, creators or publishers out of the large selection of options and is considered the perfect design for that particular asset. Once the final idea was decided more detail, colour and shading is then put into the design to make the asset appear as though they would be taken straight out of the game. If the idea is considered to be good then the idea is modeled to see how it would look in the actual game.


Concept Art for a biome in Uncharted 4

Concept Art for a building in Fallout New Vegas


Concept Art for am NCR Ranger in Fallout New Vegas

Promotion

The promotional stage happens near the end of a games creation cycle once all designs have been finalized and most of the game itself has been built. The stand out assets of the game are then presented to the general public to generate hype for the games release The assets then become not only a staple for the game but will help the game sell as depend on what the asset does it could interest a large amount of people to play the game. 

Guild Wars Logo
Promotional Concept Art for a Dungeon Loading Screen in  Guild Wars 2

Promotional Concept Art for The Last of US Environments


Bibliography
(In order of appearance)
http://kotaku.com/the-life-and-creativity-of-a-great-bethesda-artist-1740993491 

http://magazine.artstation.com/2016/05/uncharted-4-art-blast/

http://img.neoseeker.com/v_concept_art.php?caid=24963

http://img.neoseeker.com/v_concept_art.php?caid=24959

http://pcwallart.com/guild-wars-logo-wallpaper-1.html

http://bigbadworldofconceptart.com/original/

HA1 Task 1 - Mark-making Portfolio

Anatomy 


Exercise Number 1 - Direct Observation Portraits in Pairs
1. Full Face
Paper: portrait
Media: Biro
Time: 4 minutes
Left-handed (or right, if left-handed)
Instruction:Top of head/hair must touch the top edge of the paper, the chin the bottom and the ears each side. Draw loosely and freely adding as much detail as possible.


2. Cheesey Smile
Paper: landscape
Media: biro
Time: 4 minutes
Usual drawing hand
Instruction:Smiling mouth to stretch from left to right-hand side of paper. The rest of the features to fill within the page.


3. Don't Stop
Paper: portrait
Media: coloured marker pen – any colour
Time: 5 minutes
Usual drawing hand
Instruction:Draw a full face portrait that fills the page, but you may not take the pen off the paper at any point.


4. Blind-folded
Paper: portrait
Media: coloured marker pen – any colour
Usual drawing hand
Instruction:
Stare at your subject intently and draw a full face portrait. Do not look at the paper until the time is up.


Exercise Number 2 - Secondary Observation (Selfie) Self-portraits
Six Selfie-portraits
Take a range of selfies, exploring the expressions below. Choose six, the strongest for each of the expressions.
Divide an A3 sheet into six panels and make a pencil drawing from each selfie, taking approximately 15 minutes. 
Start by loosely sketching in the composition within each panel and then start to work on the tonal range of the image, establishing the lightest to darkest areas. The order and orientation is up to you, but use an additional piece of paper to protect the drawing so that you don’t smudge your work.
Include your original source images when presenting the work on your blog.


Exercise Number 3 - Manga Facial Expressions
YouTube Tutorial
Use the YouTube tutorial here to draw the two Manga-styled heads representing joy and embarrassment on an A3 sheet.
Publish your work to your Unit 69 blog following the layout on the example blog.


Exercise Number 4 - Gridded and Scaled Parcour Drawing
Parcour App Character
Using the reference image from a Parcour App character, use the gridding technique to transfer the smaller A4 photographic image to the larger A2 gridded plain paper.
You are aiming to convert the photograph into a simpler, more graphical illustration. Take each square at a time (sub-dividing it further if necessary) and simply draw out the shapes and lines you see as carefully as possible with a pencil. Give your main attention to the face, figure and text initially. It is often easier if you turn the template and photograph upside down and work on it as if it is abstract image. You can even mask off a square at a time. Having drafted out the image, colour-up the drawing using coloured pencils. Publish your work to your Unit 69 blog following the layout on the example blog.


Exercise Number 5 - Template Mythical Creature Drawing
Animal Amalgam
Use the supplied template and visual aids you’ve found on the internet (secondary observation) to create a coloured freehand drawing of a mythical creature made up of the following elements:

Head of a peacock
Wings of a bat
Torso of a man
Crab claws
Legs of a cheetah
Feet of an eagle


Exercise Number 6 - Expressive Hands Drawing
Primary Observation
Carry out  a series of four observational drawings of your non-drawing hand that suggest the following:

Anger


Stop


OK


Peace


Exercise Number 7 - Figure Movement Sequence Drawing
Secondary Observation Tracing
Using the props provided carry out a photoshoot in the studio of you using a sword and shield to step, block and then lunge. The DSLR camera will be set on multi-shot mode and will capture the movements you make in a series of photographs.

Review your images and then select four that represent each stage of the sequence. These will be printed off and you will use them to create four, traced drawings.


Exercise Number 8 - Silhoutette Figure Drawing
Primary Observation - Negative Space

Using a series of dark felt pens, produce a series of 8 figure drawings observed from life that study the pose of the model, but only draw the negative space around the figure (NOT AN OUTLINE), leaving a silhouette. Work loosely, but carefully.
Use two pieces of A3 paper folded into 4 and work in a variety of locations around the college site. You can work in both landscape and portrait formats. You may find that you have to draw more than you need as your models may move.


Perspective

Exercise Number 1 - Isometric, One, Two and Three Point Perspective Introduction

Look at the introduction to perspective: artyfactory.com – Introduction to Perspective

And then carry out the exercises using the templates for:


Isometric


One-point


Two-point


Three-point


Exercise Number 2 - 2-point Perspective Background - Spacestation Video

Using 2 point perspective create a construction with the design atheistic of a space station 


Exercise Number 3 - Crating Exercises

Using the supplied templates use a crating technique to build a variety of 3D forms:

Pyramid


Sphere


Cylinder


Cone


Torus


Exercise Number 4 - Crating Application

Using the supplied images and physical pistol as a starting point employ a 2-point perspective crating technique to create your own design of weapon.
This is an opportunity for you to demonstrate your design ability in addition to your understanding of basic perspective and crating fundamentals. Start in pencil and then decide whether you want to colour-up the design with markers or coloured pencils. Remember that this is designed as a quick, outline concept design.


Colour

Exercise Number 1 - Colour Introduction

1. Colour Wheel


Using primary coloured pencils and a cross-hatching technique, complete the colour wheel template. Then idea is to mix the secondary and tertiary colours by overlapping/blending the primary colours.


2. Colour Schemes


Using a full range of coloured markers, decide upon an analogous, complementary and triadic colour scheme and complete the supplied templates.

Analogous 


Complementary 


Triadic 


Ideas Generation

Exercise Number 1 - Alternative Uses for Clothes Pegs

Following the examples of alternative uses of everyday objects, sketch and annotate at least 20 uses for a clothes peg. These can be Use any medium you wish, but include colour. Focus on both the look of the peg and its function for your inspiration. Remember that this is an exercise about you visually communicating a broad range of strong, creative ideas quickly, fluidly and playfully, rather than creating fine artwork. 


Visual Communication

Exercise Number 1 - How To Guide

Create a guide that explains an activity using only images and symbols – NO WORDS. You will need to use the internet to research your chosen activity, both the process and visual aids. Use an A3 sheet to layout your sequence of images. Plan and sketch out your sequence in pencil and then outline it using a biro or fineliner (and coloured pencils or pens if you wish).

Choose from the one of the following activities:

Prepare and serve a pot of tea using loose leaf tea.
Create a paper frog using origami.
Fillet a mackerel.
Tie a bow tie.
Prepare a BLT sandwich.
Make a chicken out of a towel.

Option Chosen: Tie a bow tie.


Objects

Exercise Number 1 - Paper Tonal Studies

Using the supplied rolls of paper create still life environments and produce a series of four, close-up tonal observational studies of paper constructions using pencil in response to the following themes: Tied, Twisted, Folded, Curled.


Textures

Exercise Number 1 - Willow Charcoal, Soft and Oil Pastels


You are going to draw a series of 9 textures (closely observed abstracted sections of surfaces) from around the college site, three using soft pastels, three using oil pastels and three using willow charcoal. Fold 1 A3 sheet of cartridge paper into 9 to use as your canvas.